Views: 0 Author: Site Editor Publish Time: 2025-10-17 Origin: Site
Removing an axle shaft is a critical maintenance procedure that vehicle owners may need to perform when dealing with drivetrain issues. Whether you're experiencing clicking noises during turns, vibrations at certain speeds, or leaking CV joint boots, knowing how to properly remove an axle shaft can save you time and money on repairs. This comprehensive guide will walk you through the entire process, from gathering the necessary tools to successfully removing axle shafts from various vehicle types.
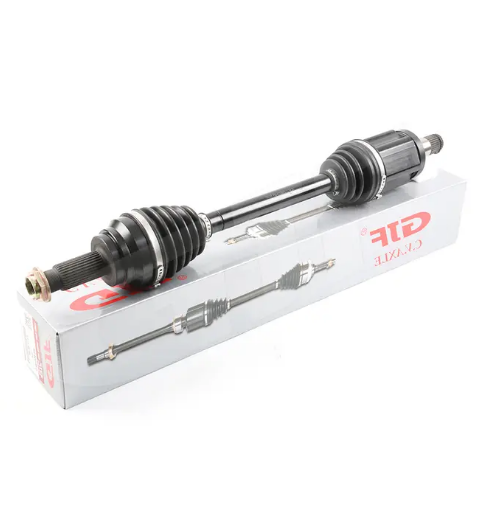
An axle shaft is a crucial drivetrain component that transfers power from the transmission or differential to the wheels. In front-wheel drive and all-wheel drive vehicles, these are typically CV axle shafts (Constant Velocity), which allow for smooth power transfer even as the suspension moves and the wheels turn. For rear-wheel drive vehicles, a drive axle shaft connects the differential to the rear wheels.
You might need to remove an axle shaft for several reasons:
Replacing worn or damaged CV joints
Addressing leaking CV joint boots
Repairing other transmission or differential components
Performing suspension work that requires axle removal
Signs that indicate your axle shaft may need attention include:
Clicking or popping noises when turning
Grease leaking from torn CV boots
Vibrations that increase with vehicle speed
Difficulty transferring power to the wheels
Before beginning the removal process, it's important to understand that axle shaft designs vary between vehicle makes and models. Japanese cars like Toyota, Honda, and Nissan may have different axle configurations compared to American vehicles like Ford, Chevrolet, and Dodge. This guide covers universal steps while noting specific considerations for different vehicle types.
Proper preparation is crucial for a successful axle shaft removal. Having the right tools not only makes the job easier but also helps prevent damage to other vehicle components.
Floor jack and jack stands
Lug wrench or impact socket set
Breaker bar (½-inch drive)
Socket set with various sizes
Torque wrench
Pry bar or large flathead screwdriver
Rubber mallet or dead-blow hammer
Axle nut socket (specific to your vehicle)
Pliers and wire cutters
Brake cleaner
Penetrating oil
Catch pan (for fluid)
Safety glasses and gloves
Axle puller tool
Ball joint separator
CV joint separator
Slide hammer
Transmission jack
Shop rags
New cotter pins (if applicable)
New axle nut (recommended)
Appropriate transmission or differential fluid
Wheel bearing grease
| Tool Type | Basic Option | Professional Option | Purpose |
|---|---|---|---|
| Removal Tool | Pry bar | Axle puller | Separating axle from hub |
| Impact Tool | Breaker bar | Air/electric impact wrench | Removing axle nut |
| Support | Jack stands | Hydraulic lift | Safely supporting vehicle |
| Protection | Work gloves | Mechanic's gloves | Hand protection |
Many of these tools can be found in standard mechanic's tool kits, but some vehicle-specific tools may need to be purchased or rented from auto parts stores. For quality replacement axle shafts and CV joint components, GJF Auto Parts offers a wide selection for both Japanese cars (Toyota, Honda, Nissan) and American cars (Ford, Chevrolet, Buick) with fast shipping and reliable performance.
Follow these detailed steps to safely and effectively remove an axle shaft from your vehicle. The process may vary slightly depending on your specific vehicle make and model, but these general steps apply to most front-wheel drive, rear-wheel drive, and all-wheel drive vehicles.
Park your vehicle on a flat, level surface and engage the parking brake.
Loosen (but don't remove) the lug nuts on the wheel where you'll be removing the axle shaft.
Lift the vehicle using a floor jack at the designated jack point.
Secure the vehicle with jack stands placed at appropriate support points.
Remove the wheel completely after taking off the loosened lug nuts.
Safety Tip: Never rely solely on a hydraulic jack to support the vehicle while working underneath it. Always use proper jack stands rated for your vehicle's weight.
Locate the axle nut in the center of the wheel hub.
If your vehicle has a dust cap covering the axle nut, remove it using a screwdriver or pry tool.
If a cotter pin secures the axle nut, remove it using pliers or wire cutters.
Using the appropriately sized socket (often a large, deep socket), remove the axle nut.
This usually requires significant force, so a breaker bar or impact wrench is recommended.
Some vehicles require you to loosen the nut while the vehicle is still on the ground to prevent the wheel from spinning.
Depending on your vehicle type, you may need to disconnect several components to access and remove the axle shaft:
For front axles:
Remove the brake caliper and suspend it using wire or a hook (don't let it hang by the brake line).
Remove the brake rotor.
Disconnect the tie rod end from the steering knuckle (remove the cotter pin and castle nut).
Separate the lower ball joint from the lower control arm (may require a ball joint separator tool).
For rear axles:
On rear-wheel drive vehicles, you may need to drain the differential fluid.
Remove any brackets or shields protecting the axle.
For both:
Disconnect any ABS sensors or other electronic connections near the hub.
Remove any retaining clips or bolts securing the axle to the transmission/differential.
For inner CV joint connection to the transmission/differential:
Use a pry bar to carefully separate the axle from the transmission/differential.
Some vehicles have a retaining clip that needs to be disengaged first.
Apply penetrating oil if the connection is stubborn.
For outer CV joint connection to the wheel hub:
Push the axle inward slightly to create separation at the hub.
Use a rubber mallet to tap the end of the drive shaft, working it loose from the hub.
For stubborn connections, a slide hammer or axle puller may be required.
Removing the entire axle shaft:
Once both ends are loose, carefully pull the axle shaft straight out.
Be mindful not to damage the transmission seal or differential seal during removal.
If the axle doesn't come out easily, check for additional retaining mechanisms.
Inspect the removed axle shaft:
Check CV boots for tears or leaks.
Inspect CV joints for damage or excessive wear.
Examine splines for wear or damage.
This systematic removal process works for most vehicles, but specific steps may vary. The following sections will address special considerations for different vehicle makes.
Japanese vehicles like Toyota, Honda, Nissan, Subaru, Mazda, and Mitsubishi often feature design elements that affect axle shaft removal procedures:
Toyota Models:
Many Toyota models use a press-fit design for the outer CV joint connection, requiring more force during removal.
Toyota RAV4 and Highlander models may need the lower control arm to be separated completely for proper axle removal.
Lexus vehicles often have specialized axle nut sizes and may require dealer-specific tools.
Honda and Acura:
Honda Civic and Accord models typically have inner CV joints secured with snap rings that need to be disengaged carefully.
The CR-V and other SUV models may have additional stabilizer links that need disconnecting.
Many Honda models require pushing in on the axle before removal to release the internal spring-loaded retaining ring.
Nissan and Infiniti:
Nissan Altima and Maxima models often have a multi-piece design that may separate during removal if not handled carefully.
The Pathfinder and other 4WD models have more complex axle shaft designs due to their all-wheel-drive systems.
American vehicles including Ford, Chevrolet, Buick, Jeep, Dodge, and GMC have their own unique considerations:
Ford Models:
Ford F-150 trucks have different axle removal procedures depending on whether they're equipped with IRS (Independent Rear Suspension) or solid axle designs.
Focus and Fusion models typically require disconnecting the lower ball joint completely.
Ford SUVs like the Explorer may need additional bracketry removed.
General Motors (Chevrolet, Buick, GMC):
Many GM vehicles use C-clips inside the differential to secure the axle shafts, requiring partial disassembly of the differential for removal.
Chevrolet Malibu and Cruze models often have axle shafts connected to the transmission with snap rings that can be difficult to disengage.
GMC and Chevy trucks may require removing the entire hub assembly before the axle shaft can be extracted.
Jeep and Dodge:
Jeep Wrangler and Cherokee models with solid axles require different procedures than models with independent suspension.
Dodge Charger and Challenger models may require lowering the subframe for proper access.
When working with specific vehicle models, consulting a model-specific repair manual is highly recommended. GJF Auto Parts specializes in axle shaft components for a wide range of vehicles, including dedicated product lines for Japanese and American vehicles, ensuring you get the right replacement parts for your specific model.
Even when following the proper procedure, you may encounter challenges when removing an axle shaft. Here are common issues and effective solutions:
| Issue | Solution | Prevention |
|---|---|---|
| Corroded axle nut | Apply penetrating oil and use impact wrench | Regular maintenance and inspection |
| Seized hub connection | Use a proper puller tool or apply heat carefully | Apply anti-seize during installation |
| Stubborn inner CV joint | Tap with mallet while prying gently | Ensure proper alignment during removal |
| Rusted splines | Use penetrating oil and twist while pulling | Clean and lubricate during installation |
Broken Retaining Clip: If a retaining clip breaks during removal, be sure to replace it with a new one during reassembly. These small components are crucial for proper axle function.
Damaged CV Boot: If you notice a torn CV boot during removal, the joint is likely contaminated with dirt and moisture. Plan to replace or rebuild the entire CV joint assembly.
Leaking Seals: If transmission fluid leaks when removing the inner CV joint, prepare to replace the transmission seal before reinstalling any components.
Damaged Threads: If the axle nut threads become damaged, don't reuse the nut. Always install a new axle nut with the correct torque specifications.
Heat Application:
For severely stuck components, carefully applying heat with a propane torch to the hub (not the CV joint or boot) can help break the corrosion bond.
Always ensure there are no flammable fluids or materials nearby.
Hydraulic Press Method:
For extremely stuck axle shafts, some professionals remove the entire hub assembly and use a hydraulic press to separate the components.
This requires specialized equipment but prevents damage to other parts.
Impact Method:
Striking the end of the axle shaft (protected with a block of wood) with a sledgehammer can sometimes free stubborn connections.
This should be done carefully to avoid damage.
By anticipating these challenges and knowing the solutions in advance, you'll be better prepared to handle axle shaft removal on various vehicle types.
Working on vehicle drivetrains involves significant safety considerations. Follow these important safety precautions:
• Always wear safety glasses to protect your eyes from debris and fluids.
• Use appropriate gloves to protect your hands from sharp edges and hot components.
• Ensure the vehicle is properly supported with quality jack stands before working underneath.
• Disconnect the vehicle's battery if working near electronic components.
• Allow the vehicle to cool completely before beginning work to avoid burns.
• Have a fire extinguisher nearby when using heat tools or working with flammable fluids.
• Clean up spilled fluids immediately to prevent slip hazards.
• Use proper lifting techniques to avoid back injuries when handling heavy components.
• Dispose of used fluids and parts according to local regulations.
When replacing axle shafts, consider using high-quality replacements from reputable manufacturers. GJF Auto Parts offers premium CV axle shafts and drive axle shafts that meet or exceed OEM specifications, with specific products designed for both Japanese and American vehicles. Their parts feature precision engineering and durable construction, ensuring long service life and reliable performance.
A1: Common signs include clicking or popping noises when turning, visible grease leaking from torn CV boots, vibration that increases with speed, and difficulty transferring power to the wheels. If you notice any of these symptoms, inspection of the axle shaft and CV joints is recommended.
A2: Driving with a damaged axle shaft is not recommended. A severely damaged axle can break completely while driving, causing loss of power to the wheels and potentially dangerous driving conditions. Minor damage should be addressed promptly before it worsens.
A3: For an experienced mechanic, axle shaft replacement typically takes 1-2 hours per side. For DIY mechanics, plan for 2-4 hours, depending on your experience level and the specific vehicle. Complex AWD systems or rusty components can extend this timeframe.
A4: While basic axle removal can be done with common tools like socket sets and pry bars, having specialized tools such as an axle puller, slide hammer, or ball joint separator makes the job significantly easier and reduces the risk of damaging components.
A5: Professional axle shaft replacement typically costs between $200-$500 per axle, depending on the vehicle make and model. This usually includes parts and labor. Using premium quality parts like those from GJF can ensure longer service life and better performance.
A6: Unlike some components like brake pads, axle shafts don't necessarily need to be replaced in pairs. You can replace just the damaged side. However, if both sides have similar mileage and wear, replacing both may be cost-effective preventive maintenance.
A7: Quality varies among aftermarket manufacturers. Premium aftermarket axle shafts from reputable suppliers like GJF often match or exceed OEM specifications and may come with better warranties. They can be an excellent alternative to more expensive dealer parts while maintaining reliability and performance.
Removing and replacing axle shafts is a manageable task for experienced DIY mechanics with the right tools and knowledge. By following the steps outlined in this guide and paying attention to vehicle-specific considerations, you can successfully complete this repair and restore your vehicle's drivetrain performance. When selecting replacement parts, choose quality components designed specifically for your vehicle make and model to ensure proper fit and function.


