Views: 0 Author: Site Editor Publish Time: 2025-09-30 Origin: Site
The drive shaft is a critical component in the automotive industry, responsible for transmitting torque and rotation to the wheels. Understanding how to properly remove and maintain a drive shaft is essential for mechanics and car enthusiasts alike. This article delves into the intricacies of drive shaft removal, offering insights into the best practices and considerations for different types of vehicles. For those interested in exploring a wide range of drive shaft options, the Wholesale Drive Shaft section provides extensive choices.
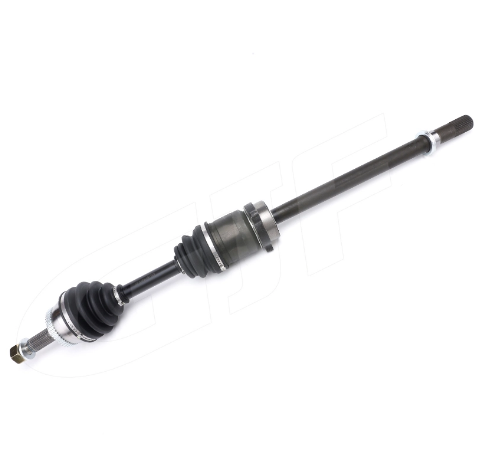
The drive shaft, also known as a propeller shaft, is a mechanical component used to transmit torque from the engine to the wheels. It plays a vital role in the drivetrain of a vehicle, especially in rear-wheel-drive, all-wheel-drive, and four-wheel-drive vehicles. The drive shaft must be strong enough to withstand the stress of driving while being light enough to avoid adding unnecessary weight to the vehicle.
Drive shafts are typically made from steel, aluminum, or carbon fiber. Each material offers different benefits; steel is durable and cost-effective, aluminum is lighter and reduces vehicle weight, and carbon fiber provides the best strength-to-weight ratio. The choice of material often depends on the vehicle's performance requirements and budget constraints.
There are several types of drive shafts, including single-piece and multi-piece shafts. Single-piece drive shafts are commonly used in smaller vehicles due to their simplicity and ease of installation. Multi-piece drive shafts, on the other hand, are used in larger vehicles where a longer shaft is needed. These shafts are connected by universal joints, which allow for flexibility and movement.
Another important distinction is between constant velocity (CV) drive shafts and non-CV drive shafts. CV drive shafts are used in front-wheel-drive vehicles and some all-wheel-drive vehicles. They allow for smooth power transfer even when the wheels are turned or the suspension is moving. Non-CV drive shafts are typically used in rear-wheel-drive vehicles.
Removing a drive shaft requires careful attention to detail and the right tools. Here is a step-by-step guide to help you through the process:
Before starting, ensure the vehicle is parked on a flat surface and the parking brake is engaged. It's also advisable to use wheel chocks to prevent any movement. Gather all necessary tools, including a socket set, wrenches, and a pry bar. Safety gear, such as gloves and safety glasses, is also recommended.
Begin by locating the drive shaft under the vehicle. It's typically connected to the transmission at one end and the differential at the other. Use a wrench to remove the bolts securing the drive shaft to the differential. Be sure to keep track of the bolts, as they will be needed for reinstallation.
Next, move to the transmission end of the drive shaft. Depending on the vehicle, you may need to remove a heat shield or other components to access the bolts. Once accessible, remove the bolts and carefully slide the drive shaft out of the transmission.
With the drive shaft removed, handle it with care to avoid damaging the joints or yokes. If the drive shaft is being replaced, ensure the new shaft matches the specifications of the old one. Store the removed drive shaft in a safe place to prevent any damage until it can be reinstalled or replaced.

Removing a drive shaft can present several challenges, particularly with older vehicles where rust and corrosion are common. Here are some solutions to common issues:
Rust and corrosion can make it difficult to remove bolts and separate the drive shaft from the vehicle. Applying a penetrating oil to the bolts and joints can help loosen them. Allow the oil to sit for several minutes before attempting to remove the bolts again. In severe cases, heat may be applied to expand the metal and break the rust bond.
When reinstalling a drive shaft, proper alignment is crucial to prevent vibrations and ensure smooth operation. Use alignment marks made during removal to guide the reinstallation process. If no marks were made, refer to the vehicle's service manual for alignment specifications.
The process of removing a drive shaft is a detailed task that requires precision and the right tools. Understanding the types of drive shafts and the steps involved in their removal can greatly enhance the efficiency and safety of the task. For those seeking high-quality drive shafts, the Auto Drive Shaft selection offers reliable options. Whether you are working on an American, Japanese, or German car, having the right knowledge and resources is key to successful drive shaft maintenance.
1. What are the signs of a failing drive shaft?
Common signs include unusual noises, vibrations, and difficulty turning the vehicle. If you experience these symptoms, it's advisable to inspect the drive shaft for damage.
2. Can I replace a drive shaft myself?
Yes, with the right tools and knowledge, you can replace a drive shaft yourself. However, if you're unsure, it's best to consult a professional mechanic.
3. How often should a drive shaft be inspected?
It's recommended to inspect the drive shaft during regular vehicle maintenance, typically every 12,000 to 15,000 miles, or if you notice any symptoms of wear.
4. What materials are drive shafts made from?
Drive shafts are commonly made from steel, aluminum, or carbon fiber, each offering different benefits in terms of strength and weight.
5. What is the difference between a CV and non-CV drive shaft?
CV drive shafts allow for smooth power transfer even when the wheels are turned, while non-CV drive shafts are typically used in rear-wheel-drive vehicles.
6. Why is drive shaft alignment important?
Proper alignment ensures smooth operation and prevents vibrations, which can lead to premature wear and damage.
7. Where can I find high-quality drive shafts?
For a wide selection of high-quality drive shafts, visit the Drive Shaft Assembly section for reliable options suitable for various vehicle types.
