Views: 0 Author: Site Editor Publish Time: 2026-03-11 Origin: Site
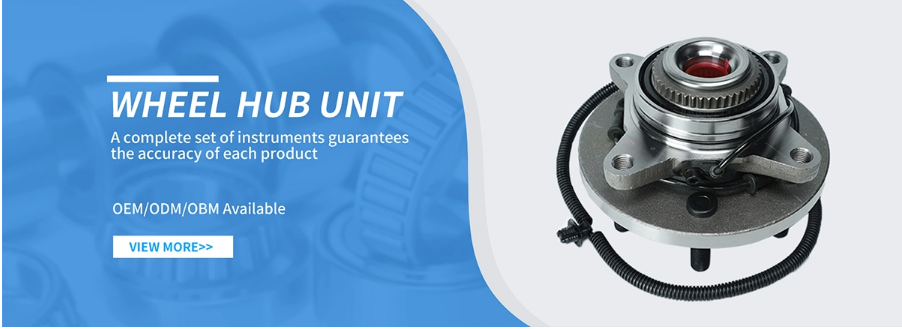
You can make your car safe by changing a bad wheel hub bearing. Many people do not know that about 22% of car problems are from wheel bearing issues. If you use a good part like the GJF Wheel Hub Bearing, your car will work better. It will have less friction and last longer. Bad bearings can make noise and shake your car. This can be dangerous for you. With the right tools and planning, you can fix this yourself. Always look at your car manual and ask an expert if you are not sure.
Changing a bad wheel hub bearing makes your car safer. It also helps your car work better. Do not ignore noises or shakes from your car.
Get all tools and parts before you start. Being ready helps you work faster and safer.
Always wear safety gear like gloves and glasses. This keeps you safe while fixing your car.
Use the right torque numbers when putting parts back. This makes sure everything is tight and works well.
Check your wheel hub bearings every 30,000 to 50,000 miles. Finding problems early can help you avoid expensive fixes.
Before you start replacing your wheel hub bearing, you need to gather the right tools and parts. Having everything ready will help you finish the job safely and quickly.
You will need some basic and special tools for this task. Here is a list to help you get started:
Jack and jack stands
Lug wrench
Socket set
Breaker bar
Screwdrivers and pliers
Wheel bearing puller tool
Slide hammer
Rubber mallet
Bearing puller or bearing press
Penetrating spray
Tip: Always use safety gear like gloves and safety glasses to protect yourself.
Choosing the right parts is very important. You should always use OE-spec parts for the best fit and safety. The GJF Wheel Hub Bearing matches original equipment standards and fits most vehicles, including cars, SUVs, and pickups. Here is a quick look at some recommended bearings for different vehicles:
Vehicle Model | Recommended Bearing | Part Number |
|---|---|---|
Tesla Model S | Front and Rear | BCA WE61960 |
2016 Chevy Equinox | Rear | BCA WE60837 |
2011 Nissan Xterra | Hub Assembly | BCA WE61172 |
The GJF Wheel Hub Bearing uses high-quality steel and strong seals. This means you get better performance and longer life for your car.
Some extra tools can make the job easier, but you do not always need them. These include:
Heat and metal hammer for stuck parts
Torque wrench for tightening bolts to the right level
Anti-seize compound for easy future removal
You should also plan your budget. If you do the work yourself, the cost for tools and parts usually ranges from $100 to $300. If you go to a professional, it can cost $250 to $600.
Service Type | Cost Range |
|---|---|
DIY | $100 - $300 |
Professional | $250 - $600 |
Make a checklist before you start. This helps you avoid missing any steps or tools.
You must set up your vehicle safely before you begin any work. Start by parking on a flat, solid surface. Engage the parking brake. Place wheel chocks behind the wheels that will stay on the ground. Gather your tools and equipment. The table below shows what you need and how to stay safe:
Tools and Equipment Needed | Safety Precautions |
|---|---|
Jack and jack stands | Wear safety glasses to protect your eyes from dust, debris, and splashing fluids. |
Lug wrench or impact wrench | Use mechanic gloves to protect your hands from sharp edges and hot surfaces. |
Socket set (metric and standard) | Follow proper lifting steps to prevent accidents. |
Torque wrench | Make sure the vehicle sits securely on jack stands and will not shift. |
Bearing puller or hub puller | Be careful around brakes. Do not damage brake parts. |
Hammer and chisel |
|
Pry bar or screwdriver |
|
Brake cleaner |
|
Anti-seize lubricant |
|
Grease gun |
|
Always double-check that the jack stands hold the vehicle firmly before you remove any wheels.
You should always wear the right safety gear. Put on safety glasses to shield your eyes from dust and debris. Use mechanic gloves to keep your hands safe from sharp edges and hot parts. Wear closed-toe shoes to protect your feet. Keep a first aid kit nearby in case of small injuries. Stay alert and work in a well-lit area.
Tip: Never rush the job. Take your time to avoid mistakes and injuries.
Many people make errors when replacing a Wheel Hub Bearing. You can avoid these mistakes by following these tips:
Do not assume a quiet wheel means the bearing is good. Some bearings fail only under load.
Always test drive and listen for noise changes with speed.
Use the sway method to check for noise when turning.
Do not use universal plastic rings. Choose machined aluminum rings for better centering.
Always install rings on the hub, not the wheel.
Check that the wheel bore matches the hub size to prevent vibration and damage.
Driving with a bad bearing can be very dangerous. Some accidents have happened because of bearing failure. In one case, a truck caught fire after a bearing failed. Another time, a wheel assembly detached and caused a fatal accident. Bearing failures can happen quickly, especially if brakes drag and cause overheating. Always replace a bad bearing as soon as possible to keep your vehicle safe.

You need to start by lifting your vehicle safely. Use a jack to raise the car and place jack stands underneath for support. Follow these steps to remove the wheel and brake assembly:
Loosen the lug nuts with a lug wrench or impact wrench.
Remove the wheel and set it aside.
Take off the brake caliper. Hang it with a wire or bungee cord so you do not strain the brake line.
Remove the brake disc rotor using the correct wrench size.
Tip: Keep all removed parts organized. This makes reassembly easier.
Handle the axle nut and ABS sensor with care. You must avoid damaging the magnetic encoder. Do not let tools touch the encoder, as this can change the N+S poles and affect the ABS signal. When pressing the bearing into the knuckle, make sure the encoder sits next to the sensor after assembly. Use a tool that only touches the end face of the outer ring. Avoid pressing on the encoder seal or inner ring. This prevents bearing failure.
Protect the ABS sensor from impact.
Check the orientation of the encoder before pressing the bearing.
Use the correct tool for pressing to avoid damage.
Detaching the hub assembly can be tricky. You should follow safe procedures to avoid damage. Here is a helpful table:
Step | Description |
|---|---|
1 | Disassemble the hub step by step. |
2 | Inspect all parts for damage. |
3 | Replace worn parts for proper function. |
If the hub assembly is stuck, apply penetrating oil and let it sit. Use a hammer gently to loosen the hub. This reduces the risk of harming nearby components.
Note: Careful inspection helps prevent costly mistakes and downtime.
When you remove the old bearing, check for signs of wear or damage. Listen for grinding noises while driving. Feel for vibrations in the steering wheel. Look for rust or corrosion around the hub. Inspect for unusual noises, uneven tire wear, and looseness by wiggling the wheel. These signs show the need for a new Wheel Hub Bearing.
Always clean the knuckle before installing the new bearing. This ensures a proper fit and smooth operation.
You need to prepare the new wheel hub bearing before installation. This step ensures smooth operation and long life. Follow these steps to get your bearing ready:
Pack the bearing with grease. Make sure grease fills all crevices and surrounds the rollers.
Install the inner bearing first. Place the bearing seal to secure it.
Slide the hub assembly onto the spindle. Insert the outer bearing into its race.
Coat the inner bearing race with a glob of grease. Set the inner bearing inside it.
Install the inner wheel-bearing seal. Make sure it sits flush with the hub’s inner surface.
Attach the new rotors. Lay the assembled hub on a clean surface.
Coat the outer bearing race with grease. Slide the hub onto the spindle.
Seat the inner bearing properly on the spindle. Slide the outer bearing into its race and secure it with the spacer and nut.
Thread the castellated nut onto the spindle. Tighten gently. Do not apply real torque yet.
️ Tip: Always use clean hands and tools. Dirt can cause bearing failure.
You must press and seat the wheel hub bearing with care. This step prevents damage and ensures proper fit. Use the following method:
Remove the bearing from its packaging only when you are ready to install it. This keeps dirt away.
Use a tool that touches only the end face of the outer ring. The tool’s outer diameter should be less than the bearing’s outer diameter.
Align the bearing with the knuckle bore. Press it vertically into the knuckle.
Never press the inner ring. Make sure the bearing stays straight. Press until it seats fully.
Insert a new snap ring. Fix the dust cover to the knuckle.
Support the hub so the shaft stays vertical. Push on the end face of the inner ring until the bearing seats.
You can also use a driver set to gently knock down the bearing. Apply even pressure. Install the seal using the correct size from the driver’s set.
⚠️ Note: Pressing the bearing incorrectly can cause noise or early failure.
You must reattach the hub to ensure proper alignment and function. Follow these steps:
Inspect motor mounts for damage. Replace if needed.
Remove coupling bolts. Separate the couplings. Check for rust or damage.
Make sure flange surfaces are clean and undamaged. They must engage snugly.
Apply a light lubricant to the faces and pilot bushing. This helps engagement.
Pre-position the engine or transmission output coupling using alignment methods.
Check the gap between coupling faces with a feeler gauge. The gap must meet acceptable standards.
Adjust motor mounts to minimize the gap.
Rotate the shaft coupling. Recheck measurements to ensure true alignment.
Install coupling bolts. Torque them properly. Use the correct fasteners.
Confirm that motor mount adjustable screw studs are not at full travel. This allows for future adjustments.
Tip: Double-check all bolts and fasteners. Proper alignment prevents vibration and extends the life of your wheel hub bearing.
You have now installed the new wheel hub bearing. The hub sits securely and aligns with the spindle. You can move to the next step: reassembly and checks.
You need to reinstall the brake caliper and wheel after replacing the bearing. Start by placing the caliper back onto its bracket. Tighten the bolts securely. Slide the brake rotor into position. Make sure it sits flush. Next, mount the wheel onto the hub. Hand-tighten the lug nuts in a star pattern. This helps the wheel seat evenly.
Reinstall the caliper and secure bolts.
Position the brake rotor correctly.
Mount the wheel and tighten lug nuts in a star pattern.
Use a torque wrench for final tightening.
Tip: Always check that the brake pads sit correctly and do not rub against the rotor.
You must follow the torque specifications from your vehicle’s manufacturer. These specs ensure that fasteners hold the hub and brakes securely. Using the correct torque prevents failures and keeps your car safe. Look up the values in your car’s manual or a trusted database. Never guess or use “tight enough” as a rule.
Note: Trust the manufacturer’s torque specs. They are critical for proper installation.
Check the brakes and wheel alignment before driving. Press the brake pedal several times to confirm a firm feel. Inspect the wheel for wobble or uneven gaps. Look at the rotor and caliper for signs of rubbing. If you see any issues, adjust the parts before moving on.
Take your car for a test drive. Listen for noises like humming, clicking, grinding, or growling. Pay attention to sounds that change during acceleration or turning. Watch for clunking over bumps. The table below shows common issues:
Symptoms | Description |
|---|---|
Grinding Noise | A grinding noise at higher speeds means metal-on-metal contact. |
Noise Change with Steering | Noise that worsens or changes pitch when turning points to front hub problems. |
If you notice abnormal sounds or vibrations, follow these steps:
Remove the wheel and inspect the hub.
Use a screwdriver or pry bar to check for looseness.
Diagnose one wheel at a time.
Compare with the same wheel on the other side.
Listen and feel for signs of trouble.
Failing bearings can cause reduced control, unpredictable handling, and even wheel detachment. Always check your work and fix any issues right away.
You have now completed the installation and checks for your Wheel Hub Bearing.
You can replace a Wheel Hub Bearing by following these steps:
Protect the magnetic encoder and keep it clean.
Use the right tools and press the bearing correctly.
Clean all contact surfaces before assembly.
Tighten bolts to the recommended torque.
Check your work and test drive at low speed.
Why Choose GJF? | Benefit |
|---|---|
High-Strength Steel | Lasts longer and handles heavy loads |
Advanced Seal System | Keeps out water and dust for smooth operation |
Ultra-Smooth Finish | Reduces noise and vibration for a quiet ride |
Tip: Always inspect your bearings every 30,000 to 50,000 miles. Regular checks improve handling and lower repair costs. If you hear odd noises or feel vibrations, ask a professional for help.
You can hear grinding or humming noises from your wheels. You may feel vibrations in your steering wheel. Your tires might wear unevenly. If you notice these signs, check your wheel hub bearing.
You should not drive with a bad bearing. It can cause your wheel to detach or your brakes to fail. Always replace a faulty bearing right away to stay safe.
You need a jack, jack stands, lug wrench, socket set, bearing puller, and torque wrench. Safety gear like gloves and glasses helps protect you. Optional tools make the job easier.
Feature | Benefit |
|---|---|
High-quality steel | Lasts longer |
Strong seals | Keeps out dirt and water |
OE specifications | Fits most vehicles perfectly |
You should inspect your wheel hub bearings every 30,000 to 50,000 miles. Regular checks help prevent problems and keep your car running smoothly.


